


This guide provides detailed installation instructions for the Yale Smart Cabinet Lock. This guide will help you:
- Download the Yale Access App
- Prepare the cabinet for lock installation
- Install the Smart Cabinet Lock
- Set up the Smart Cabinet Lock in the Yale Access App
Watch the video below, or follow the written instructions, for installation steps:
Before You Get Started
Prepare the cabinet for installation: Clean surface before application and allow up to 24 hours.
What You Need
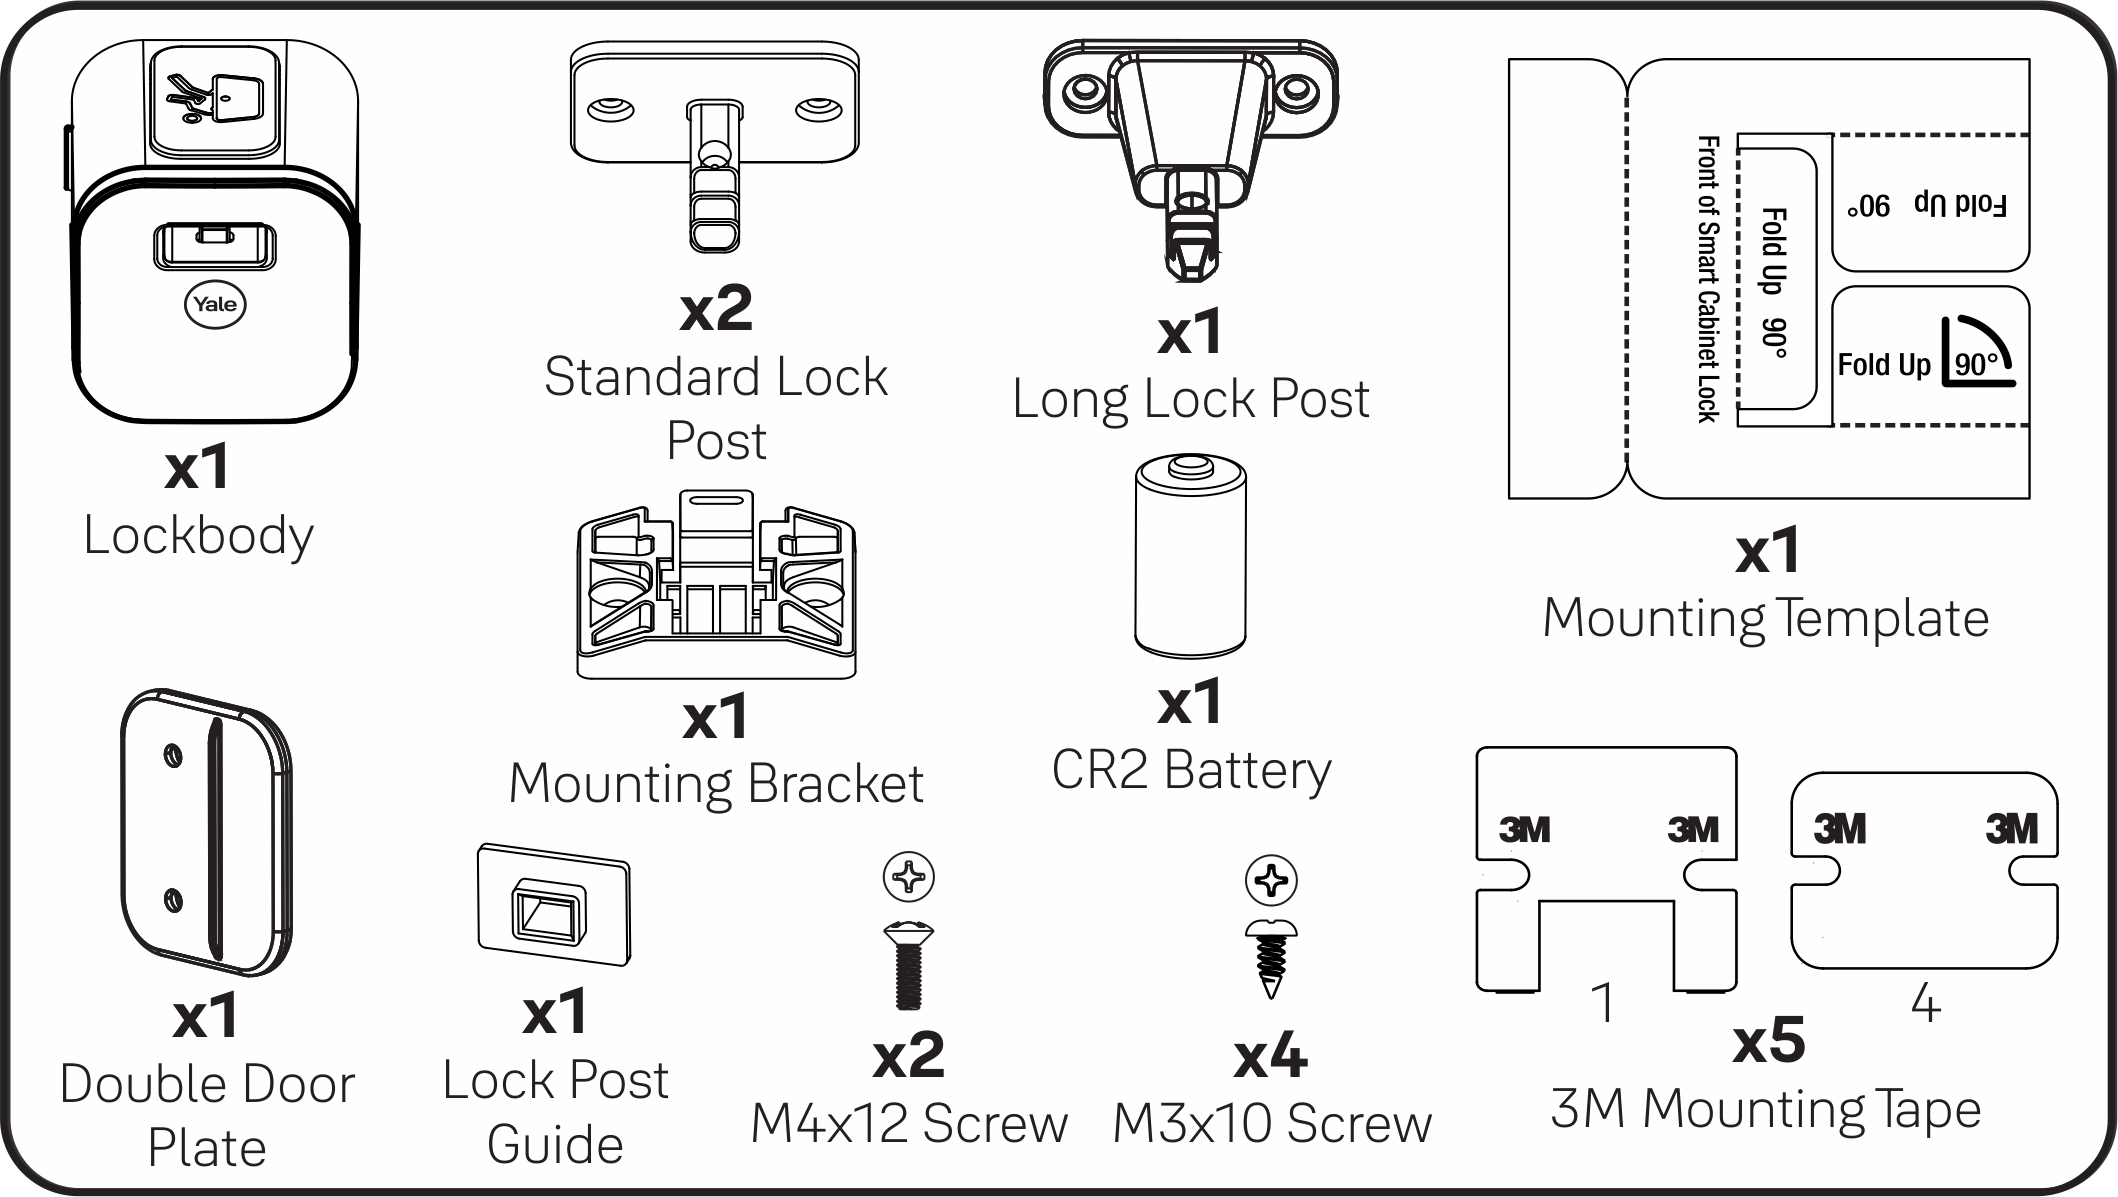
The following is a list of everything you need to begin installing this lock. Verify that all of these parts were included in the packaging:
- Lockbody
- 2x Standard Lock Posts
- 1x Long Lock Posts
- Mounting Template
- Mounting Tape
- Mounting Bracket
- CR2 Battery
- Double Door Plate
- Lock Post Guide
- M4x12 Screw
- M3x10 Screw
What You Need to Provide
- Philips Head Screwdriver*
*Optional
Installation Steps
Step 1. Download the Yale Access App
The Yale Access App is needed to control your Yale products from your mobile device. The Yale App is available for iPhone and Android. Download the Yale App from the App Store or Google Play depending on your device.
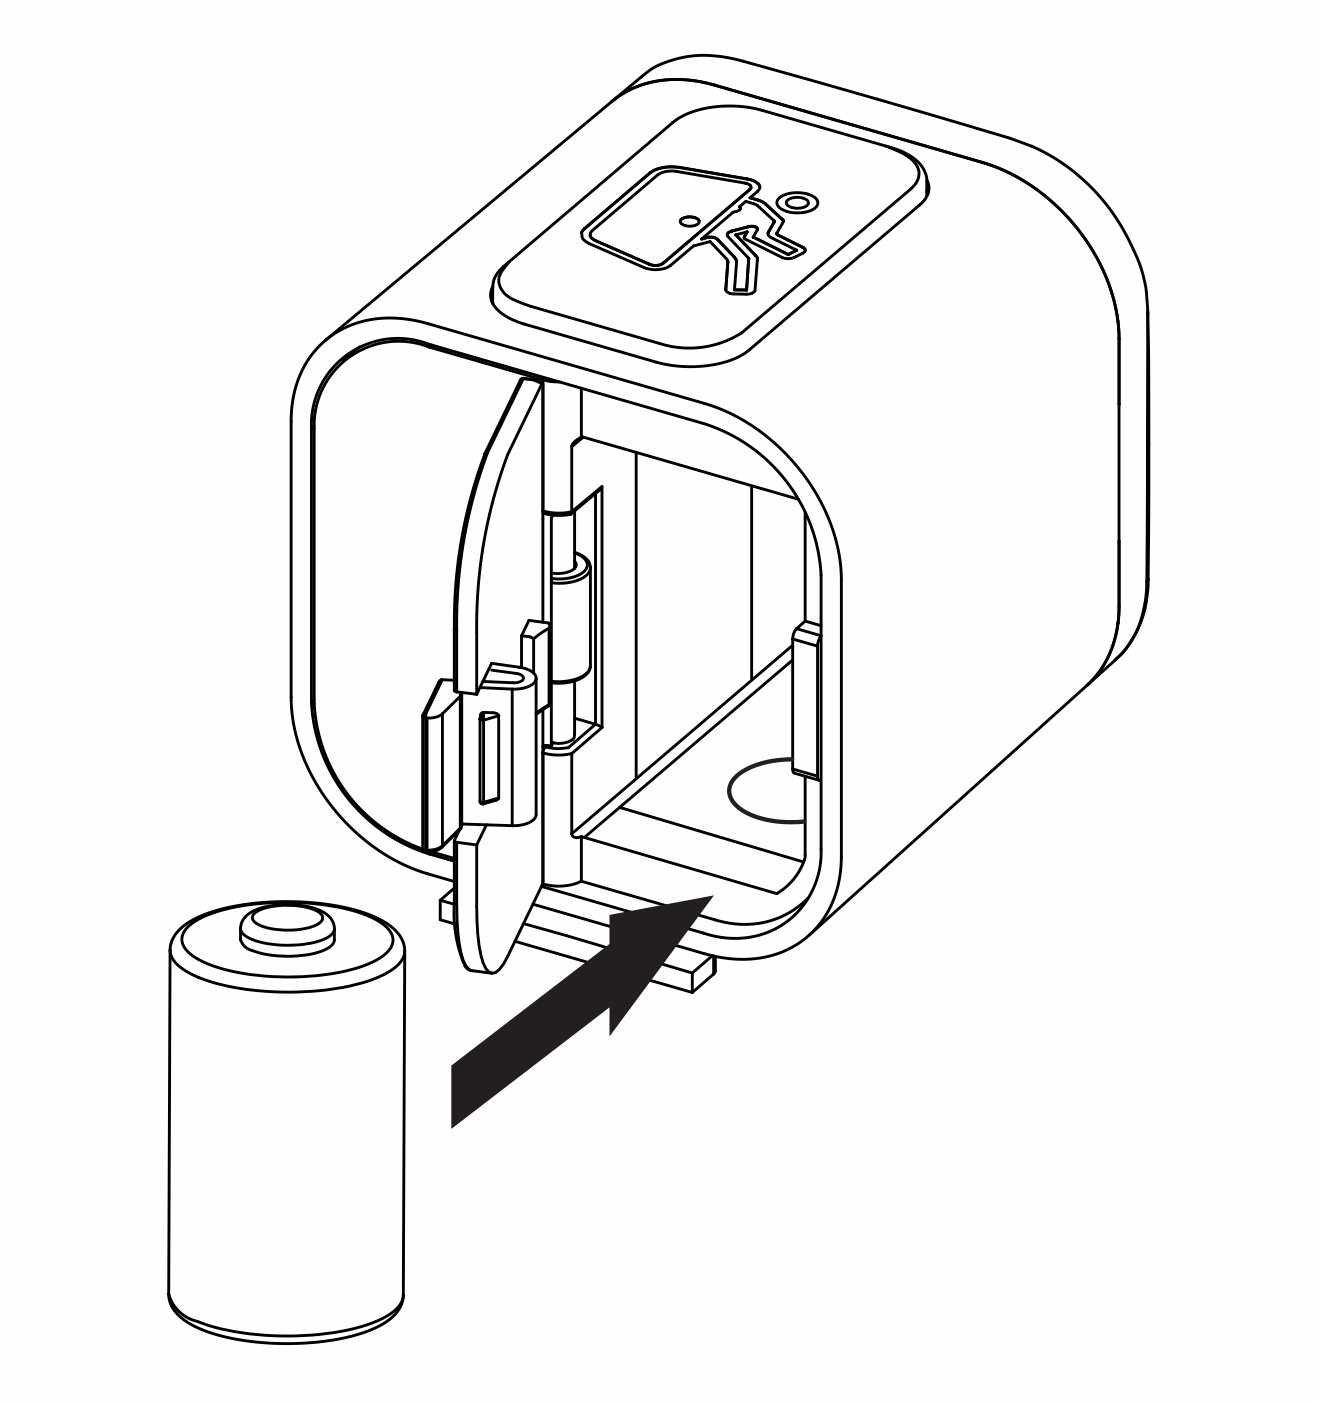
Step 2. Insert CR2 Battery into Lockbody
Open the battery compartment and insert the CR2 battery into lockbody (as shown).
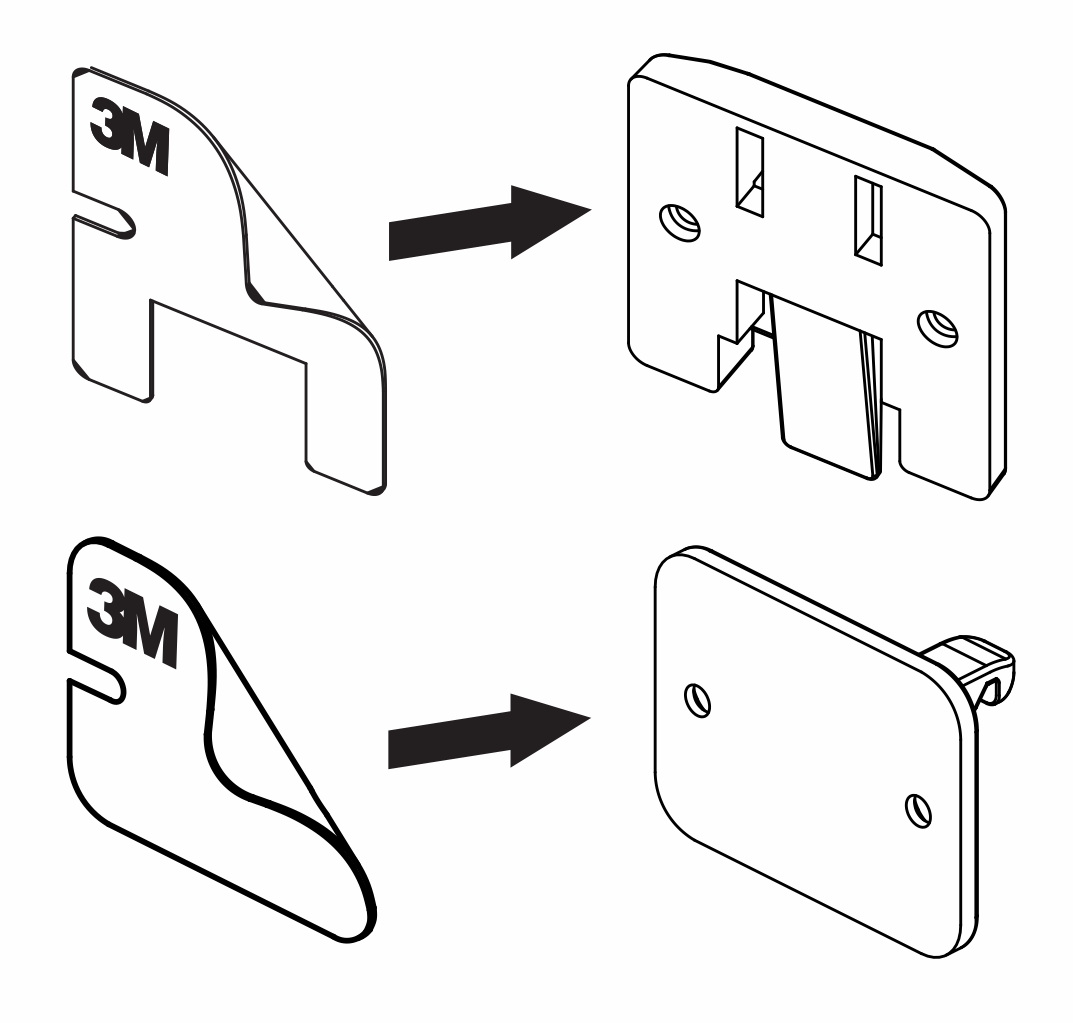
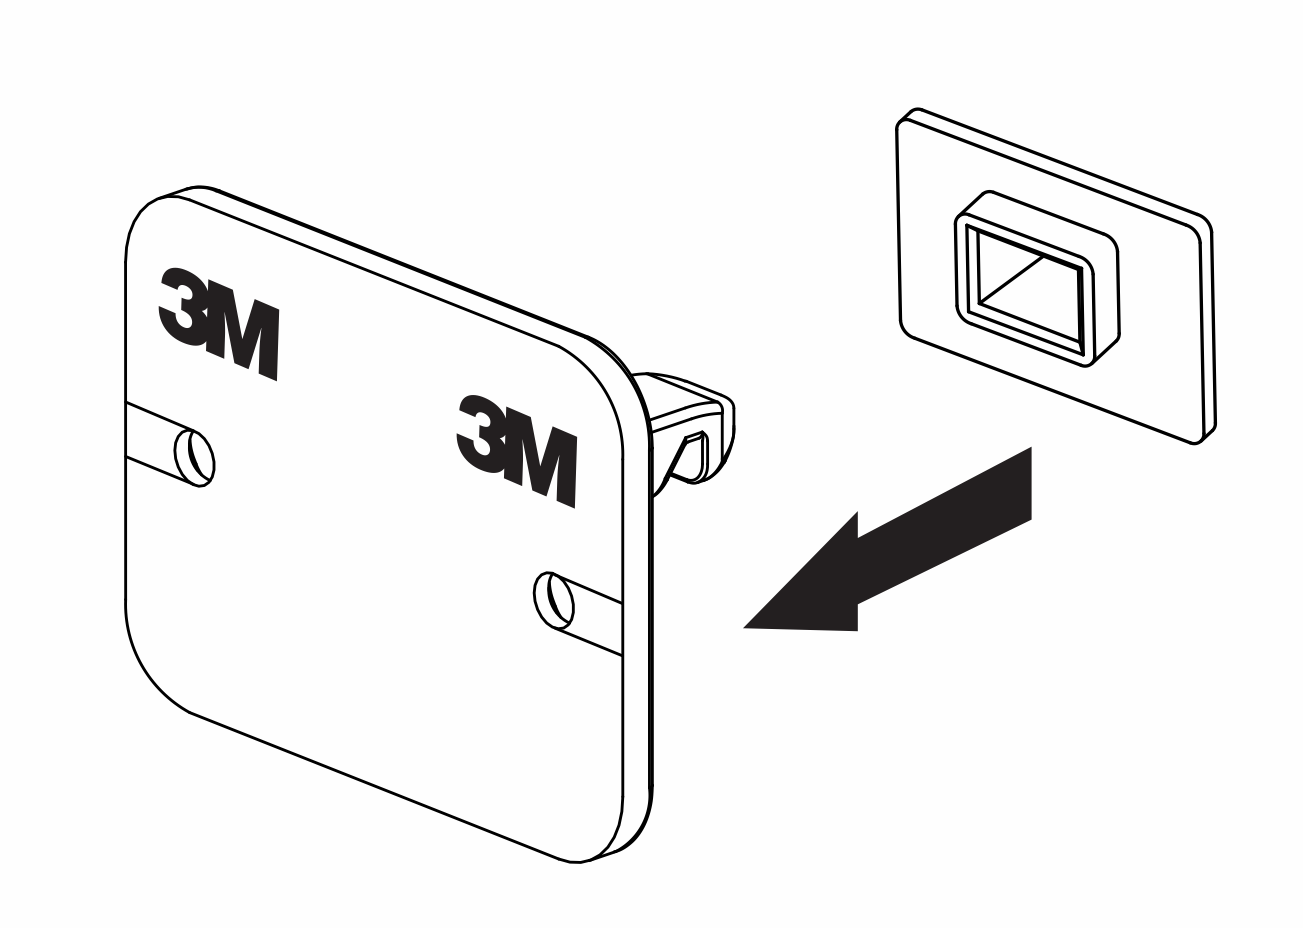
Step 3. Attach 3M Tape to Mounting Bracket and Lock Post
The mounting tape helps to correctly position the lock post to the cabinet door.
PLEASE NOTE: If the cabinet has a face frame or lip (max 1” high x max 1-1/4” deep), use the long lock post.
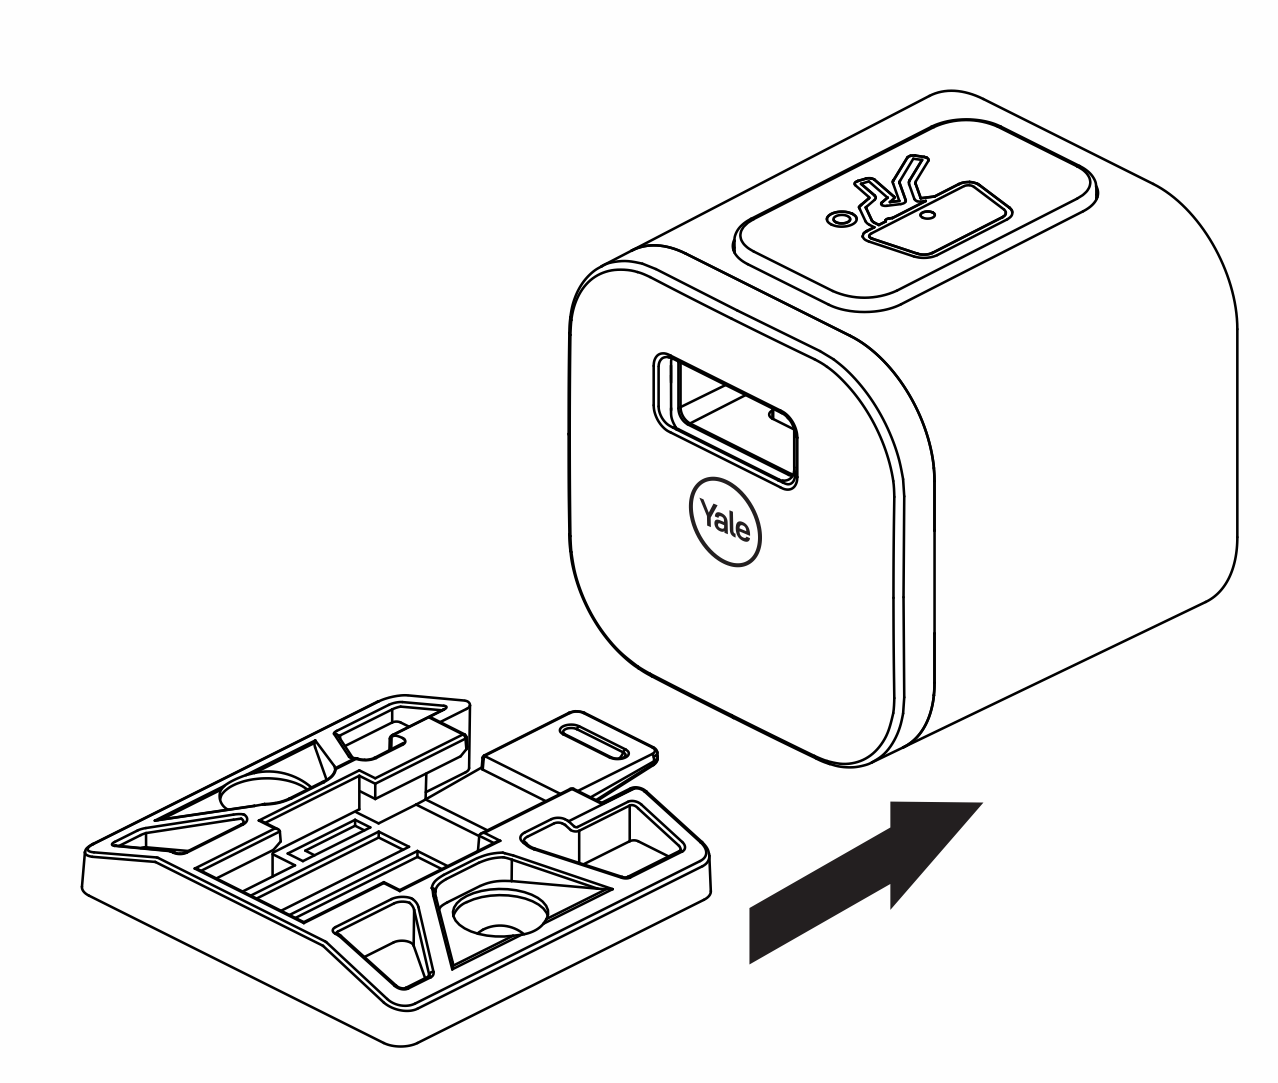
Step 4. Slide Mounting Bracket onto Bottom of Lockbody
Step 5. Slide Lock Post Guide onto Lock Post
Lock post guide helps to position the lock post with the lockbody.
Step 6. Attach Lock Post to Lockbody
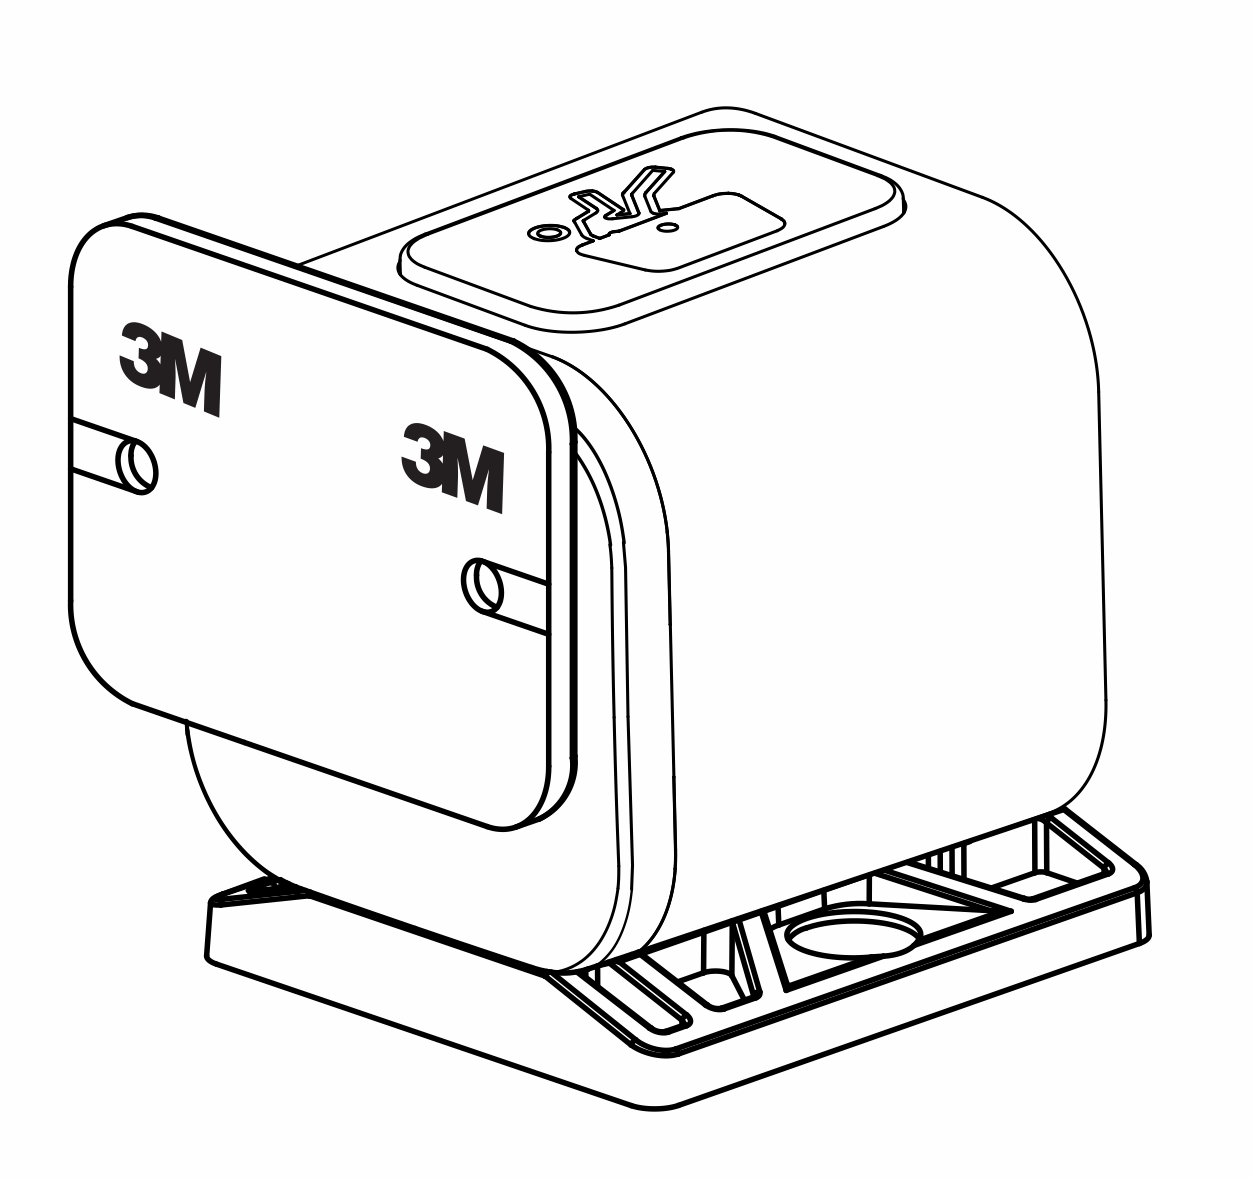
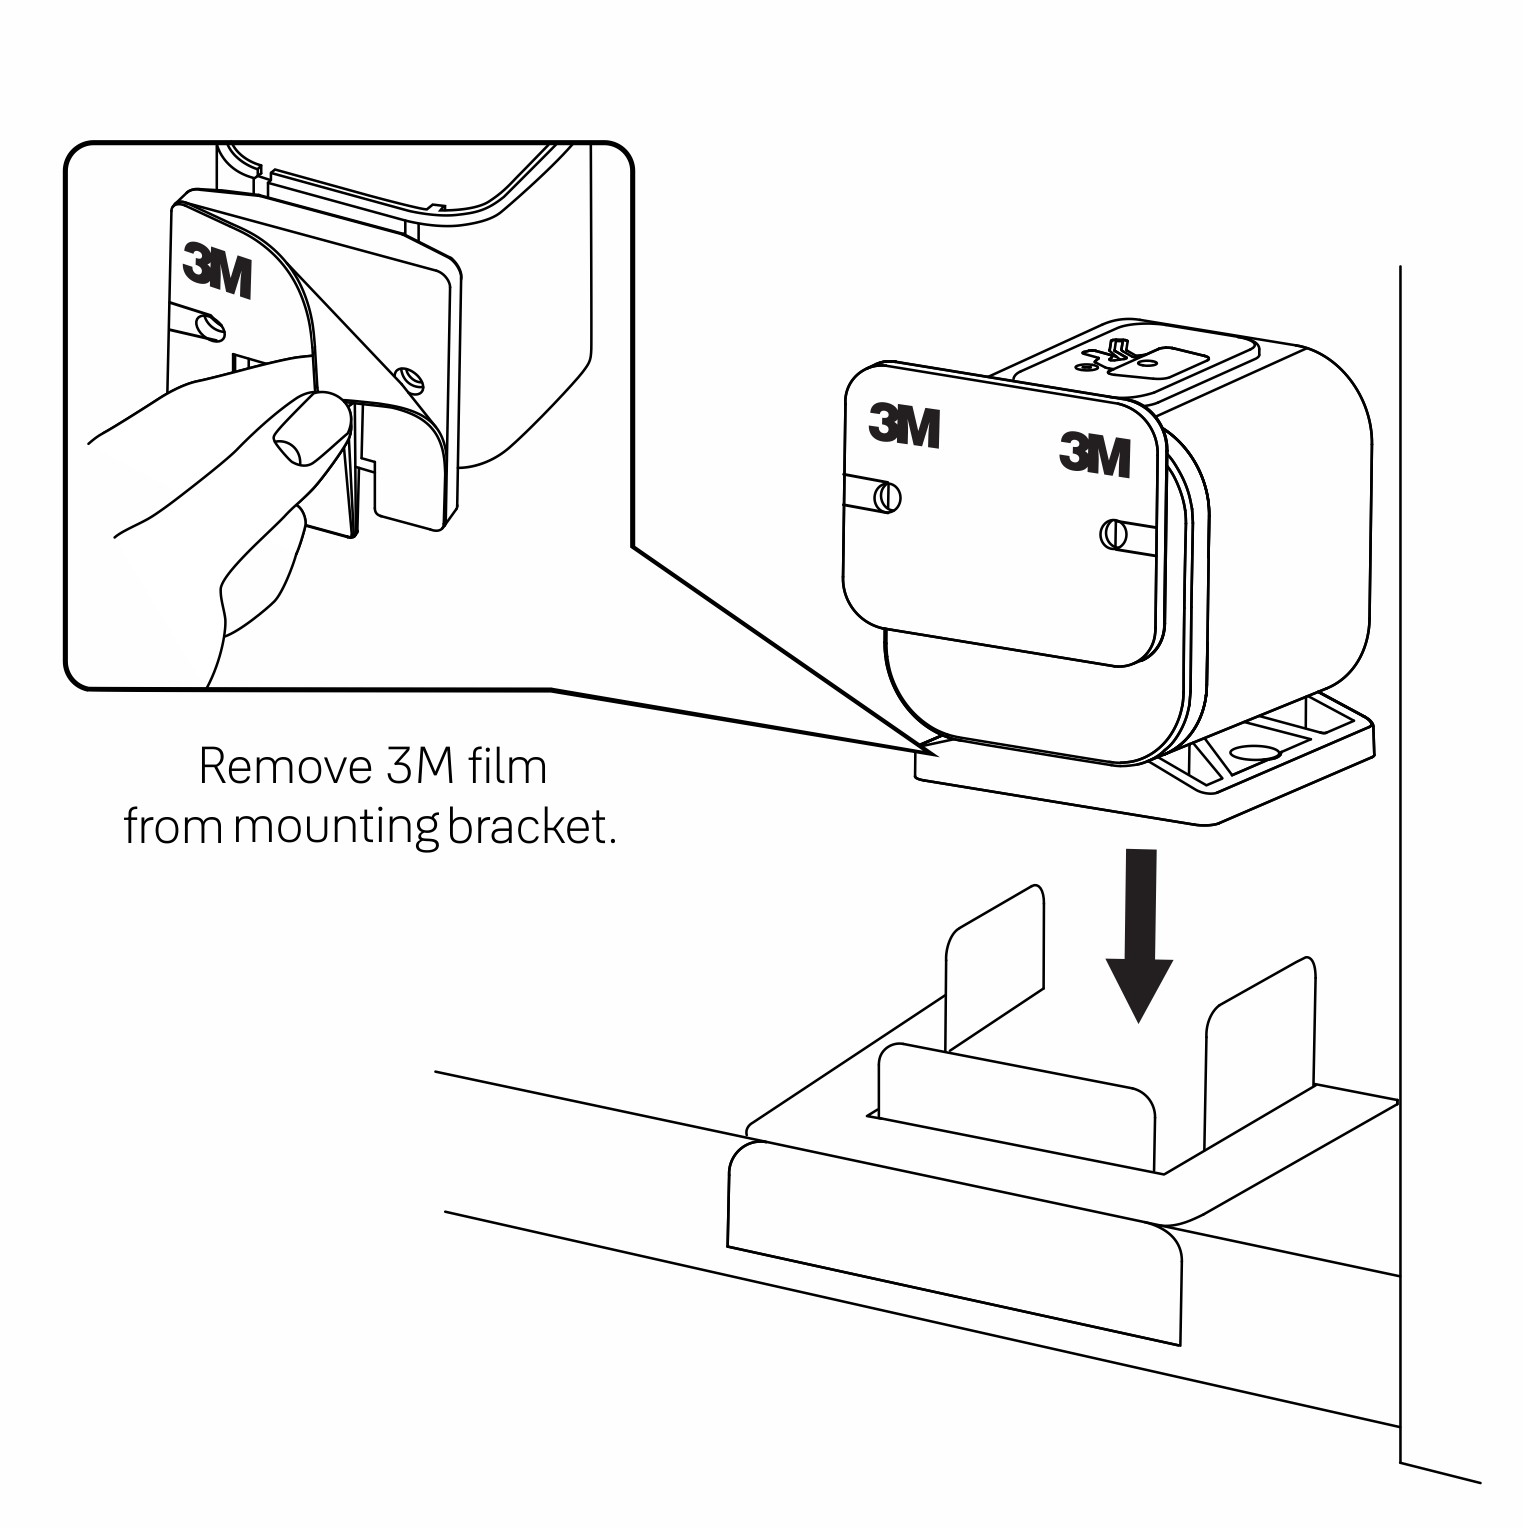
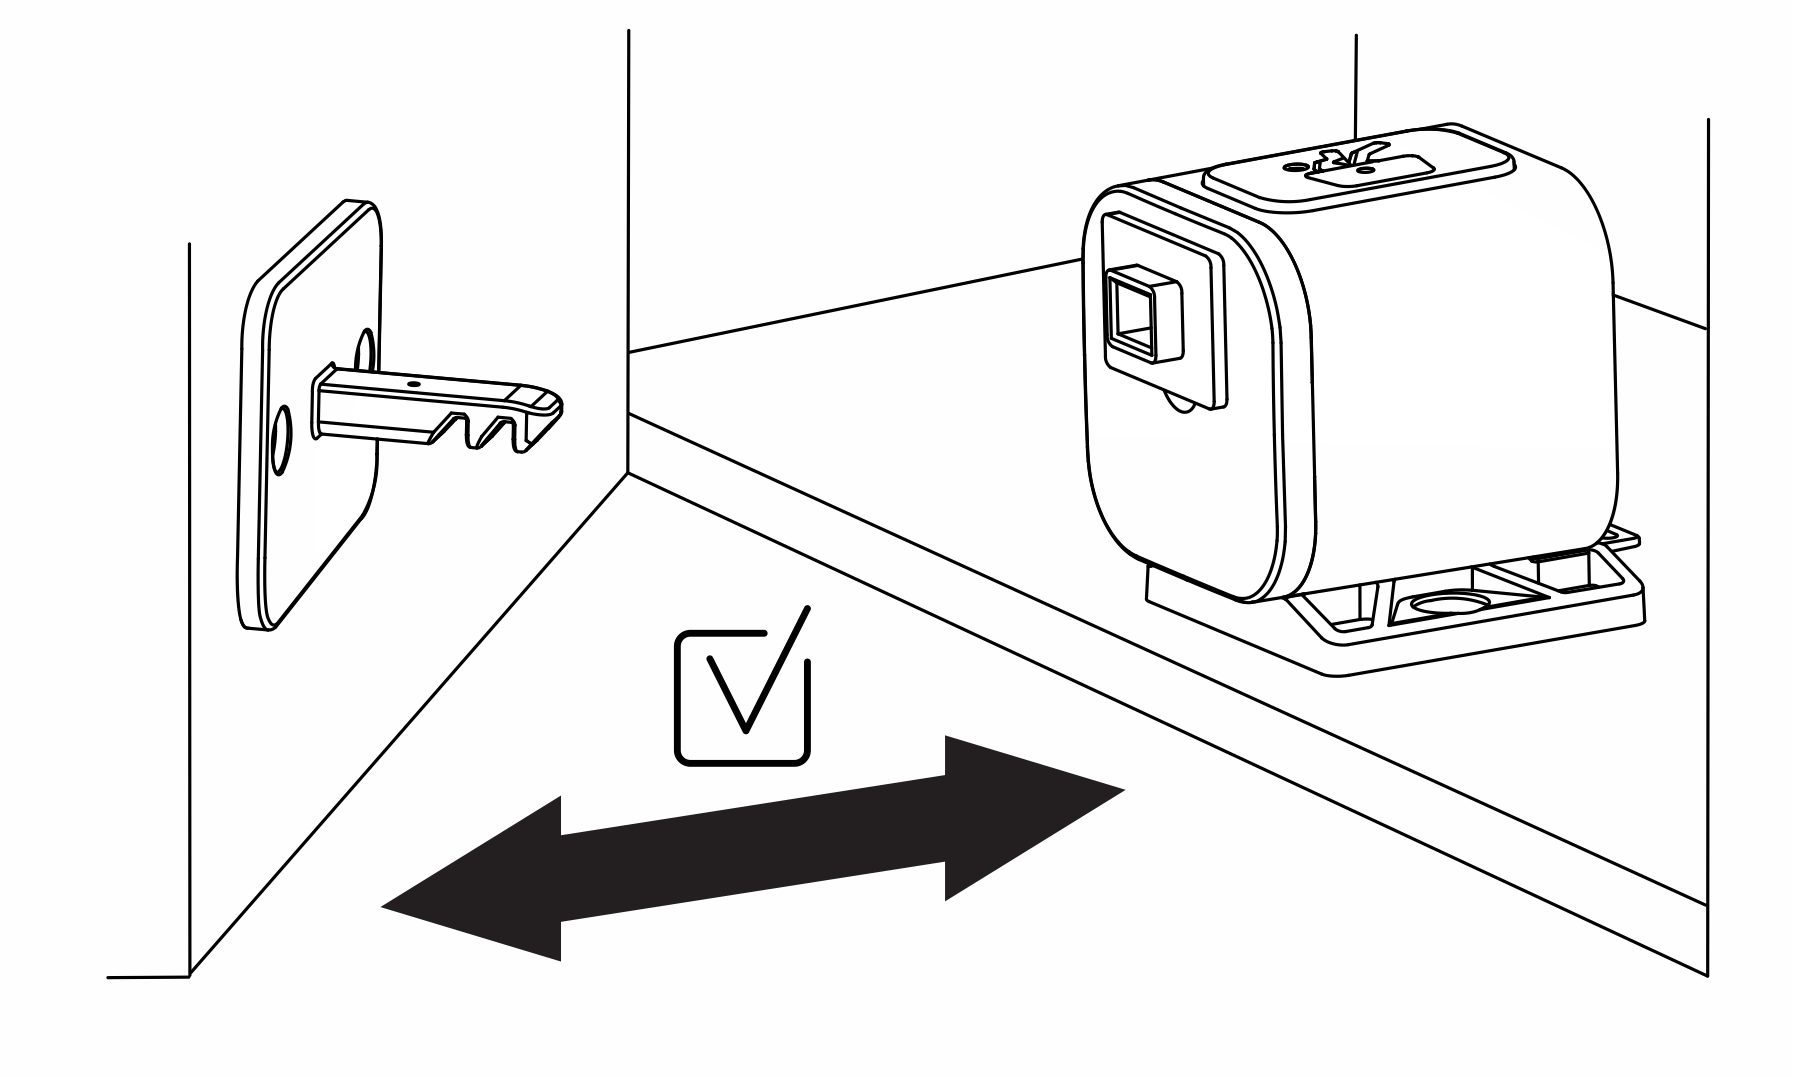
Step 7. Install Smart Cabinet Lock
Place mounting template in desired location for installation. Remove the film from the mounting tape and position the lock according to the template.
PLEASE NOTE: Mounting template can not be used to position the lock when using the long lock post.
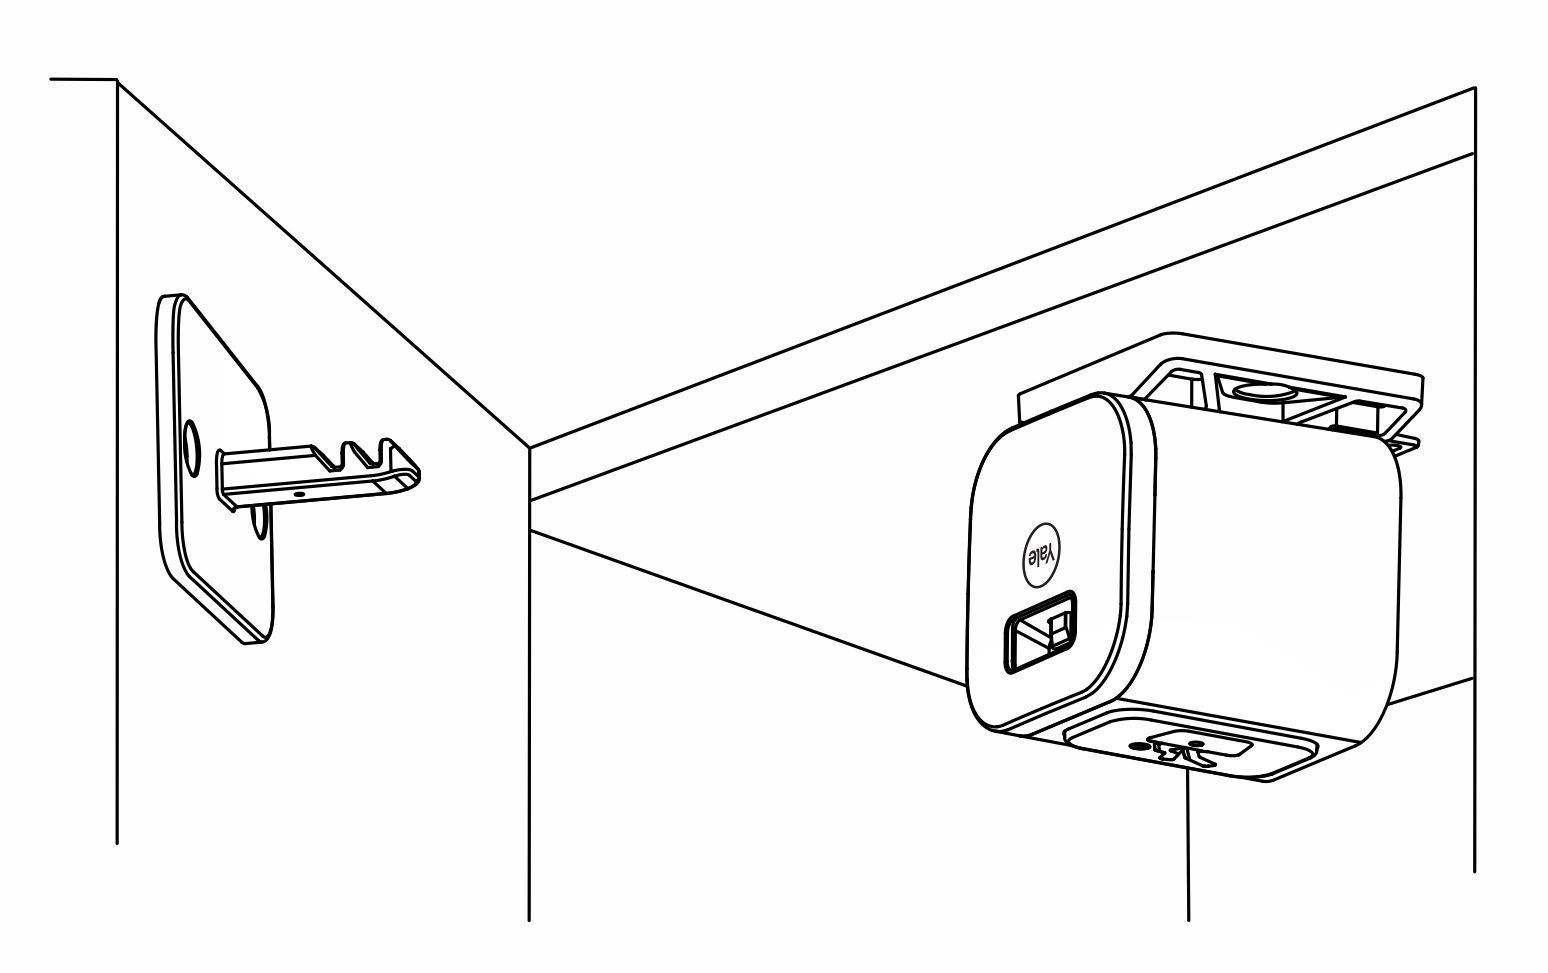
Step 8. Attach Lock Post to Door
Remove the film from 3M mounting tape and close the cabinet door. This action will help affix the lock post to the cabinet door.
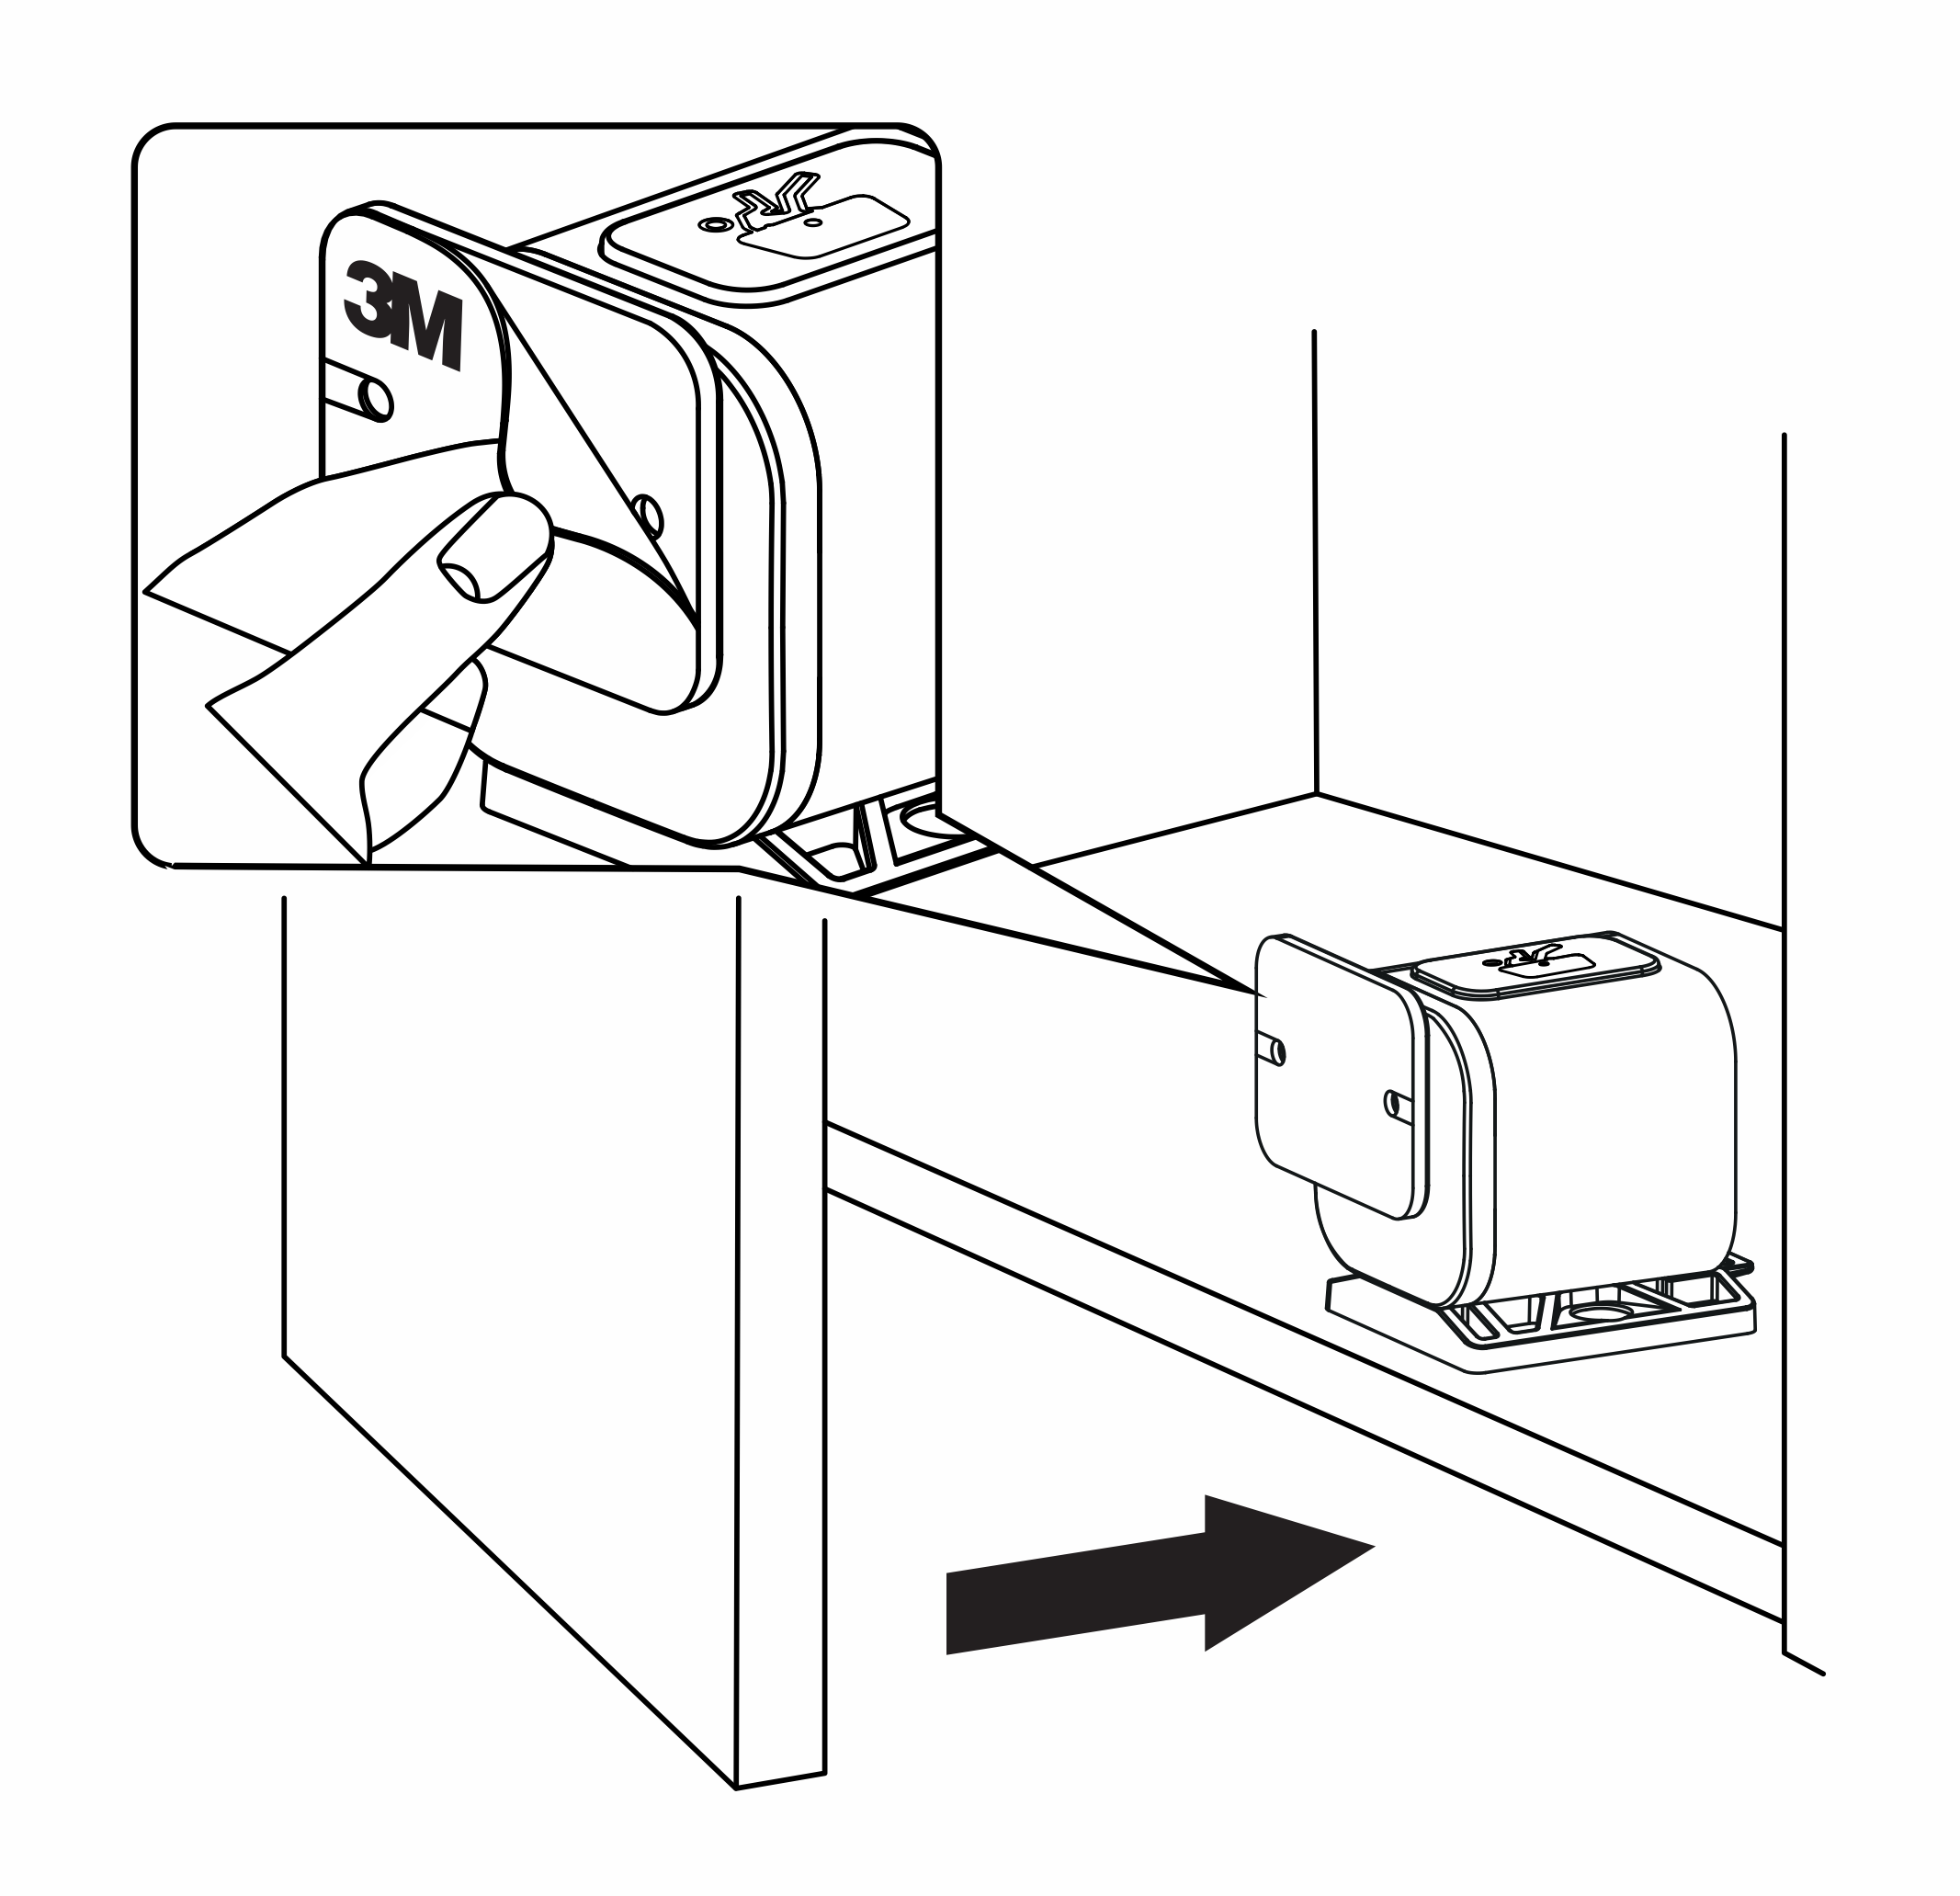
Test Operation
Ensure the lock post is aligned with the lockbody.
Step 9. Remove Lock Post Guide
Congratulations! This completes the setup of your Smart Cabinet Lock.
Next, set up the device in the Yale Access App.
- Open the Yale Access App
- Select Set up a Device
- Scan the QR code on the Smart Cabinet Lock
- Follow the in-App instructions to complete setup
PLEASE NOTE: In the event that the QR code will not scan, you will need to use the serial number to complete in-app setup. The serial number for the Smart Cabinet Lock can be found on the bottom of the packaging.
Alternative Installation Steps
Screw Mounting
You have the option to install the Smart Cabinet Lock using only the mounting tape. For a more permanent installation, use the included screws. Make sure the screws are no longer than the depth of your cabinet door.
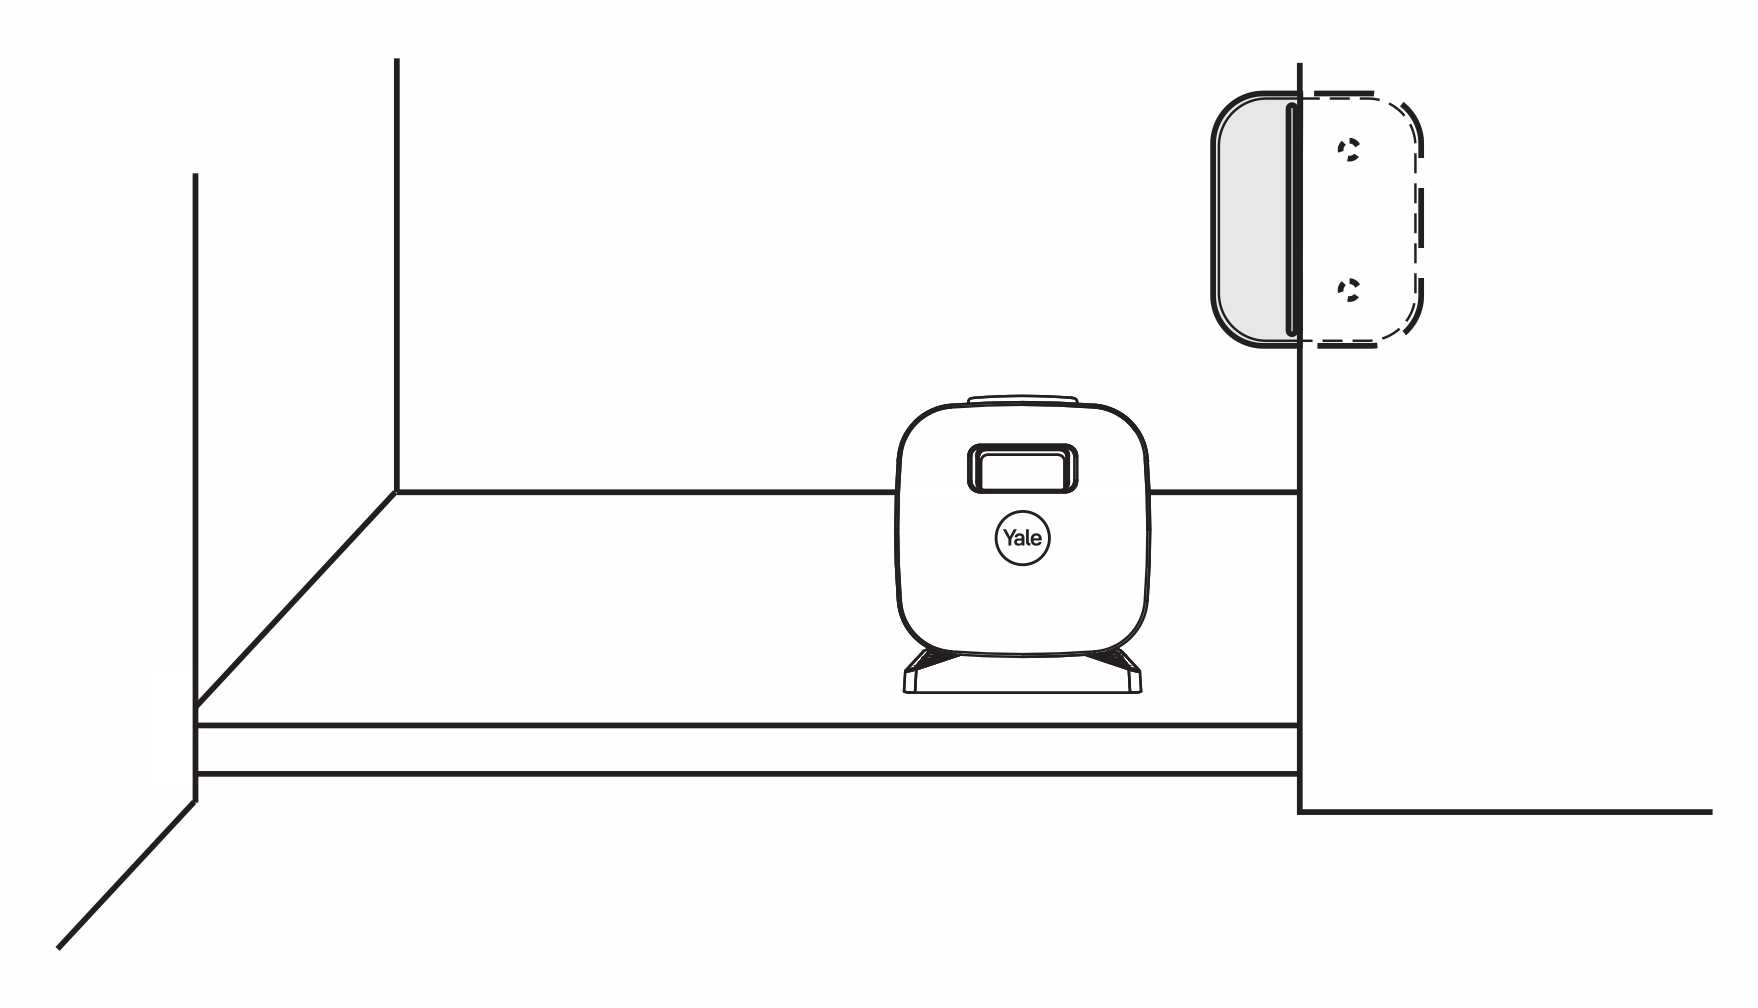
Top of Cabinet Installation
The Smart Cabinet Lock can also be installed on the top of a cabinet (as shown).
Double Door Plate
Use screws OR double-sided tape to adhere the double door plate when installing the Smart Cabinet Lock on the adjacent door of a double door cabinet.
Long Lock Post
The Long Lock Post is used on cabinets with a face frame or lip no taller than 1” and no deeper than 1-¼”.
PLEASE NOTE: The mounting template can not be used to position lock when using the long lock post.