


This article provides physical installation steps and Yale App set for the Yale View Doorbell Camera. A list of Frequently Asked Questions specific to the Yale View is available here.
What's in the box

What you'll need

Using the Wedge
Your Yale View comes with an optional mounting wedge, which can adjust the viewing angle of the camera. Most installations will not require using the wedge, but you may consider it if:
Your Doorbell Cam is mounted further away from the door
You wish to use screws other than what is provided, as there is more room for larger screw heads with the wedge.
You can test the viewing angle of your Doorbell Cam before mounting it by viewing the doorbell video feed in the Yale App while you're positioning the camera. We recommend testing with and without the wedge before selecting an installation location.
Prior to installing Yale View, review the installation best practices below to ensure a smooth installation process.
Installation Best Practices
Charge the battery fully and set up in the Yale App before physical installation
Remove the battery from your doorbell cam by pushing on the metal battery release tab on the back and sliding it out of the device. Once it’s out, remove and discard the sticker covering the battery contacts.
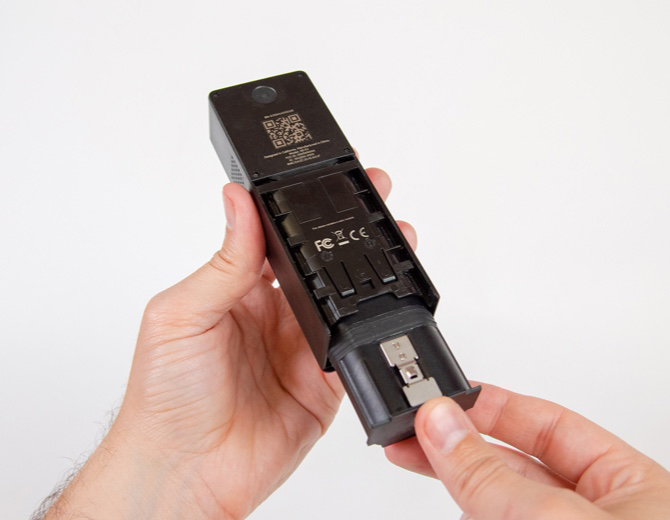
Plug the included USB cable into the battery, and the other end into an AC powered USB charger to fully charge the battery. The red light will turn green once the battery is fully charged.
Insert the battery back into your doorbell cam as shown, and download the Yale App to continue setup.
Optimize Your Wireless Connection
Your Wi-Fi access point should be within 15-20ft of your door to ensure the best performance. Your Yale View will perform optimally if your Wi-Fi access point is on the same floor and as close to your Doorbell Cam as possible. If the Wi-Fi access point is too far from the device, the Doorbell Cam will not receive a strong enough signal. Multiple stories or brick/stone walls within your home may also contribute to signal interference.
Be Aware of Your Installation Surface
Surfaces such as brick, concrete, cement siding, and stucco require a masonry bit for drilling.
Also note that certain surface types such as brick and stucco can cause Wi-Fi interference. For example, stucco usually contains metal mesh wiring which can dramatically reduce the strength of your Wi-Fi signal.
Confirm Optimal Installation Location
The View Doorbell Cam can be mounted anywhere with a strong Wi-Fi signal and secure mounting surface. Before you install the device, ensure that the viewing area of the camera properly captures the area you wish to surveil, and that it is easy for guests to ring the doorbell. We recommend mounting at a height of 48” (120cm) for optimal access.

Installation
Follow the first 4 steps below to install the Yale View doorbell camera. Depending on the orientation of your front door, you will either need to follow the basic installation instructions, or the installation with wedge, for the remaining steps.
Step 1. Position the camera where you want it on the wall
Recommended position is near your door and approximately 48 inches up from the ground.
It's a good idea to check your chosen position before mounting to the wall. This is done by viewing live video from the doorbell cam in the Yale App while testing mounting locations.
Make sure the doorbell camera captures the desired area before mounting. If needed, the included wedge can be placed between the wall and the doorbell cam to adjust the horizontal viewing angle.
Step 2. Mark the location
Using a pencil or other marking device, trace a line on the wall at the bottom of the doorbell to mark the location you’ve selected.

Step 3. Mark the holes
Align the mounting plate with your mark on the wall. Using a pencil or other marking device, mark the location of the two screw holes in the mounting plate.

Step 4. Drill the holes (if necessary)
Some surfaces, like wood and composite siding, may not require drilling holes first. You may be able to simply screw in the included screws. Refer to the chart below to determine what type of installation is appropriate for your wall.


Step 5. Select Installation Type: Flush Mount or Wedge Installation
Select Basic Installation for a flush mount installation or Installation with Wedge depending on your doorway setup.
Flush Mount installation
Step 6. Screw mounting plate to the wall
Once any required holes are drilled and anchors have been placed, screw the mounting plate to the wall with the included screws.

Step 7. Attach the doorbell to the mounting plate
Slide the doorbell onto the mounting plate. The doorbell should be positioned about ¼ inch up from the bottom of the mounting plate, and the tabs on the plate should fit into the notches in the doorbell body. Once the tabs are engaged, slide the doorbell down to fit securely on the mounting plate.


Step 8. Tighten the retention screw (optional)
Tighten the retention screw at the bottom of the mounting plate to secure the doorbell to the mounting plate.

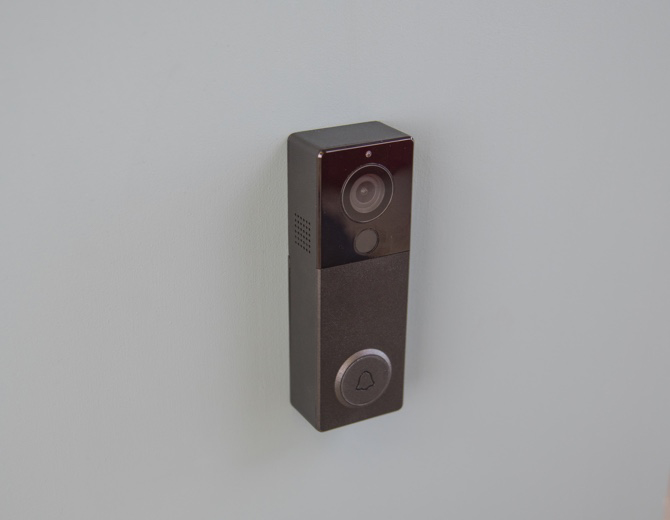
Installation of the doorbell device is complete!
Step 9. Set up the Yale View Chime
The initial doorbell setup flow includes an option to set up a chime. If a doorbell has already been set up, a chime can be added from the app menu. From the app’s main menu (top left corner of the screen), select “Set up a Device”. Scroll through the list of devices and select “Set up a Chime”, then follow the step-by-step instructions.

Step 10. Syncing Yale View with Your Smart Lock
The Yale View can be integrated with Yale Smart Locks and Connected by Yale Smart Locks. If you would like to sync your Yale View with a Smart Lock, an Yale Connect Wi-Fi Bridge is required.
PLEASE NOTE: The Yale View does not currently operate as a bridge for smart locks.
If you already have a lock with a Wi-Fi Bridge, the initial doorbell setup flow will present an option to sync the lock.
If a doorbell has already been set up, a lock can be synced from the doorbell settings menu. Select the settings menu (gear icon), then select the doorbell. Scroll down the settings and select “Sync Doorbell to Lock”, then follow the step-by-step instructions.
Installation with Wedge
Step 6. Screw the wedge to the wall
Attach the wedge to the wall first, using the included screws into the drilled holes or anchors as needed.

Step 7. Screw mounting plate to the wedge
Using the included smaller machine screws, screw the mounting plate to the wedge.

Step 8. Attach the doorbell to the mounting plate
Slide the doorbell onto the mounting plate. The doorbell should be positioned about ¼ inch up from the bottom of the mounting plate, and the tabs on the plate should fit into the notches in the doorbell body. Once the tabs are engaged, slide the doorbell down to fit securely on the mounting plate.


Step 9. Tighten the retention screw (optional)
Tighten the retention screw at the bottom of the mounting plate to secure the doorbell to the mounting plate.

Installation of the doorbell device is complete!
Step 10. Set up the Yale View Chime
The initial doorbell setup flow includes an option to set up a chime. If a doorbell has already been set up, a chime can be added from the app menu. From the app’s main menu (top left corner of the screen), select “Set up a Device”. Scroll through the list of devices and select “Set up a Chime”, then follow the step-by-step instructions.

Step 11. Syncing Yale View with Your Smart Lock
The Yale View can be integrated with Yale Smart Locks and Connected by Yale Smart Locks. If you would like to sync your Yale View with a Smart Lock, an Yale Connect Wi-Fi Bridge is required.
PLEASE NOTE: The Yale View does not currently operate as a bridge for smart locks.
If you already have a lock with a Wi-Fi Bridge, the initial doorbell setup flow will present an option to sync the lock.
If a doorbell has already been set up, a lock can be synced from the doorbell settings menu.