


This article provides instructions to set up the Yale Smart Delivery Box.
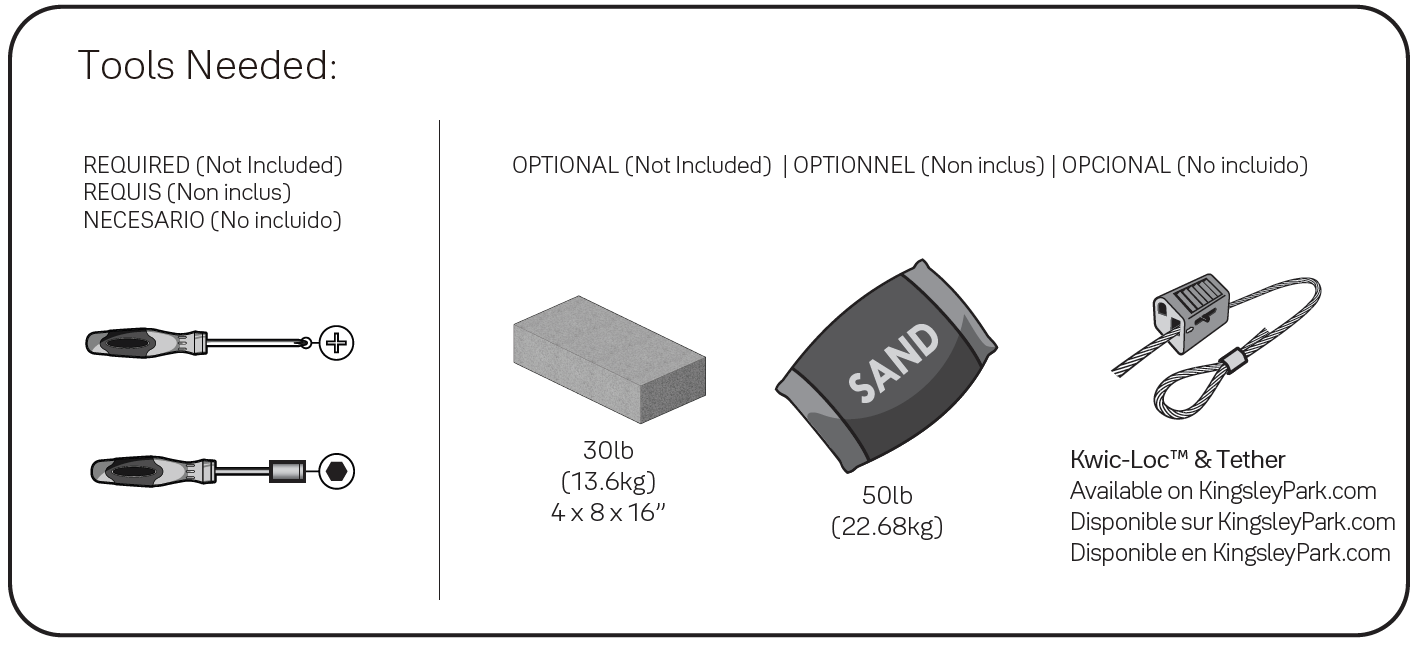
What You Need
- Philips Head Screwdriver (Not-included)
- T-15 Torx Bit (Included)
- 30lb weight (Optional)
- 50lbs of sand (Optional)
- Kwic-Loc™ and Tether (Optional)
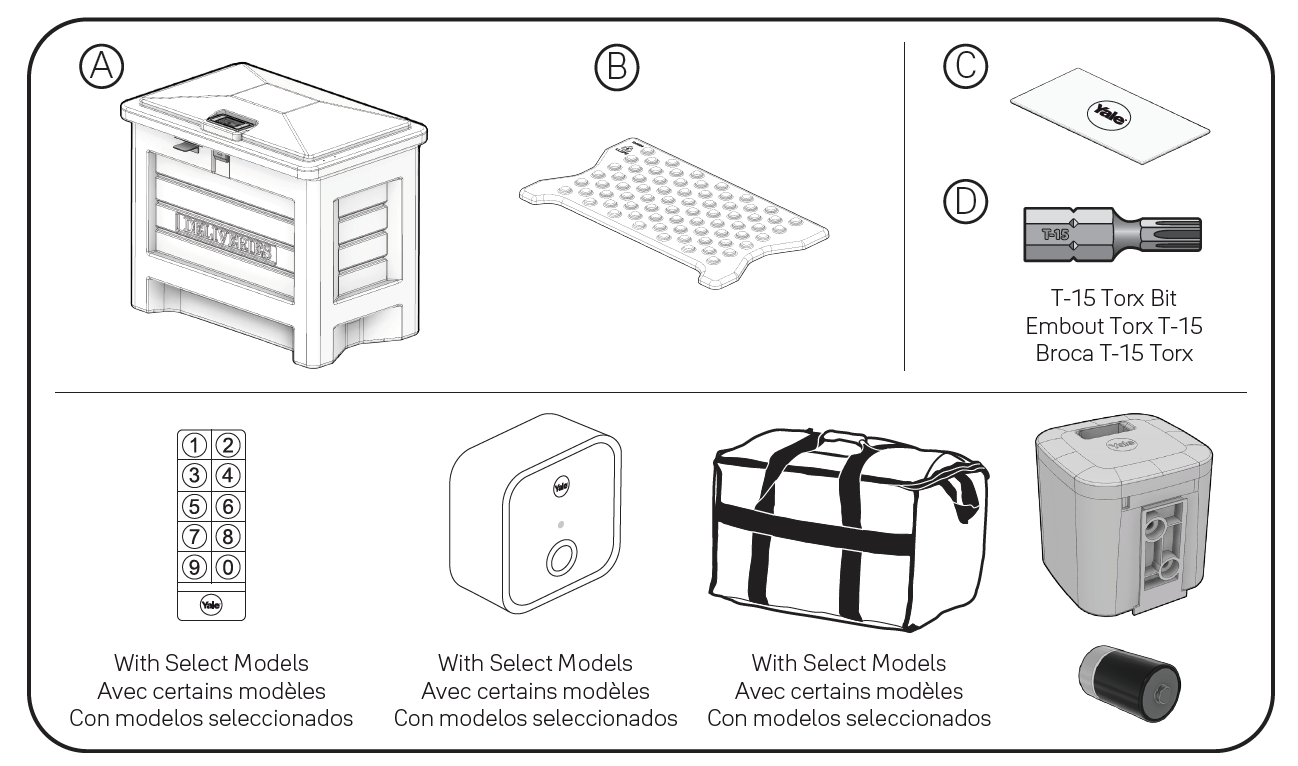
What's Included
- Yale Smart Delivery Box
- Floor Tray
- Yale logo plate
- T-15 Torx Bit
Before getting started, download the Yale Access App (iOS or Google) if you haven't already. Create an account. If you already use the August App, you can use the same username and password.
Tap "Set up a device" from the app menu. Scan the QR code located on the Quick Start Guide that was packaged with your Delivery Box. If you can't find your QR code, tap "Can't scan the code" and enter your serial number. This number can be found on the battery door of your white smart lock or on its packaging.
Once you've assembled and set up your Smart Delivery Box, the app will walk you through setting up your Yale Connect Wi-Fi Bridge which is required for away from home access and smart integrations.
If your Smart Delivery Box came with a Smart Keypad, you'll set that up last by tapping "Set up a device" from the app and following the in-app instructions.
Installation Steps
Step 1. Add Additional Weight (Optional)
To further secure box it is suggested to add one of the following underneath floor tray:
- 50lb (22.68kg) bag of sand
- 30lb (13.6kg) concrete block (4 x 8 x 16”)
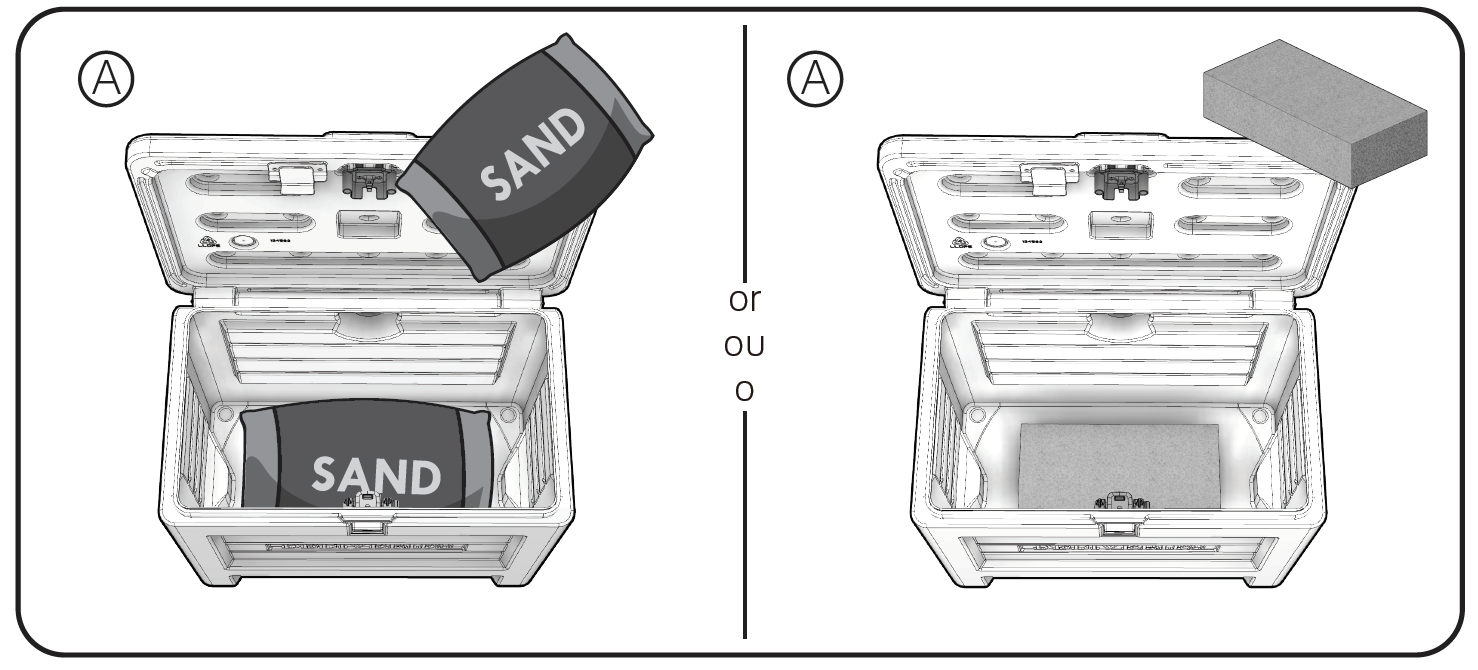
Sand bag note: Leave in bag and press flat so tray sits level.
Concrete block note: Center in bottom so tray does not tip when packages are placed in box.
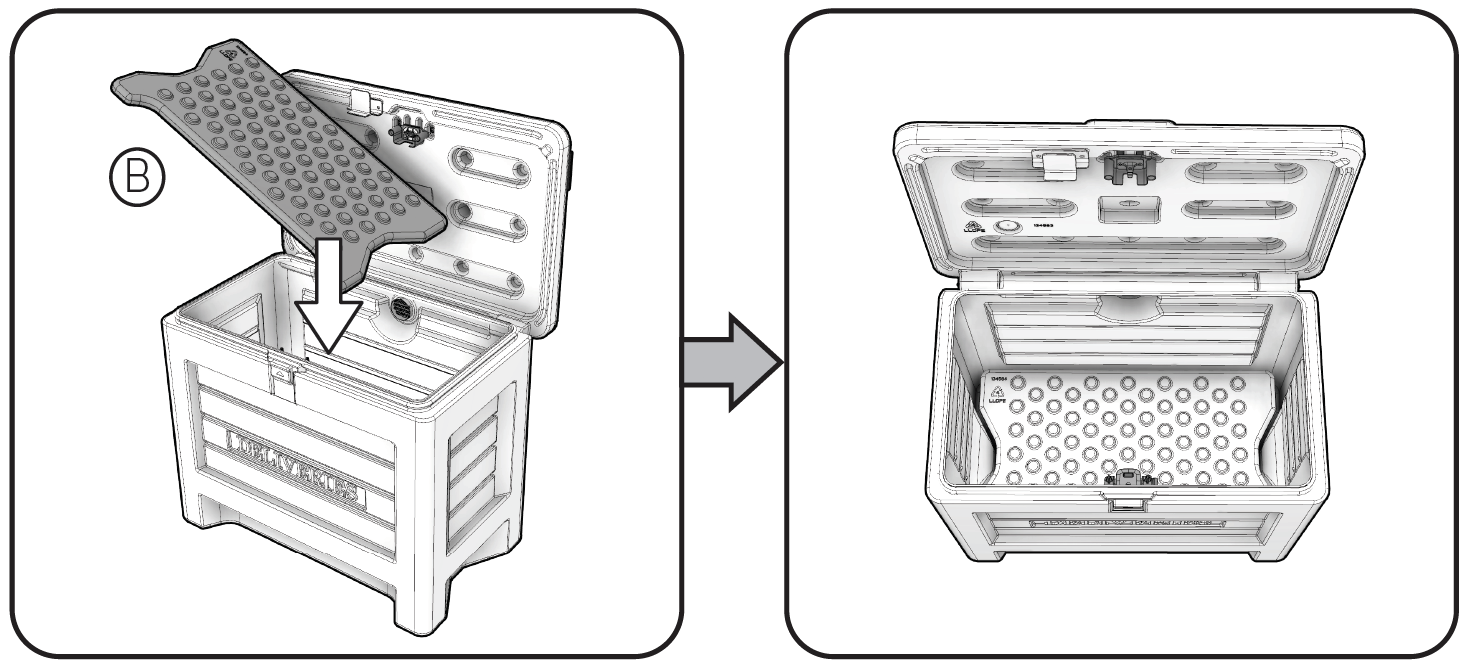
Insert floor tray.
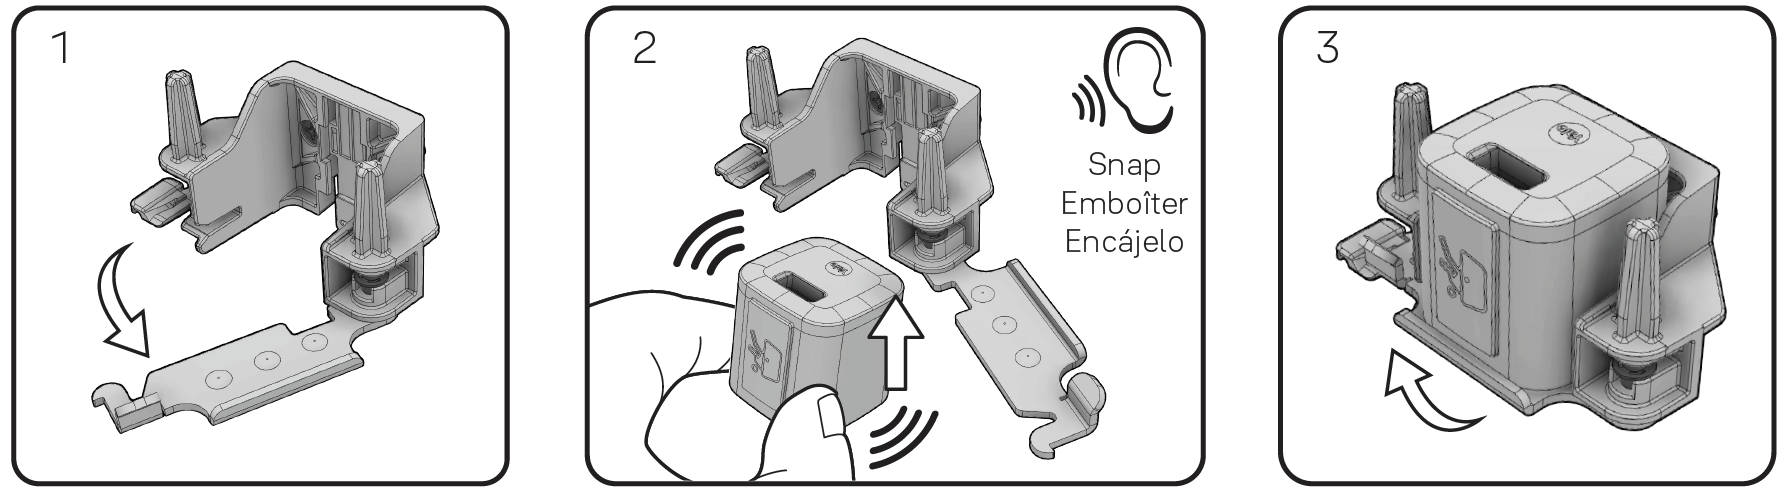
Step 2. Install Yale Smart Lock
Locate box containing Yale Smart Lock.
Swing bracket lever open to allow installation of lock.
Align lock to lock bracket as illustrated. Ensure both sides of lock track are parallel to lock bracket. Snap lock in to position. Pull down lightly to make sure lock is seated correctly.
Close bracket lever.
Check Lock Alignment
During shipping it is possible that the lock post can become loose and move out of position. To check alignment, GENTLY close lid and verify that the lock assembly connects correctly and smoothly.
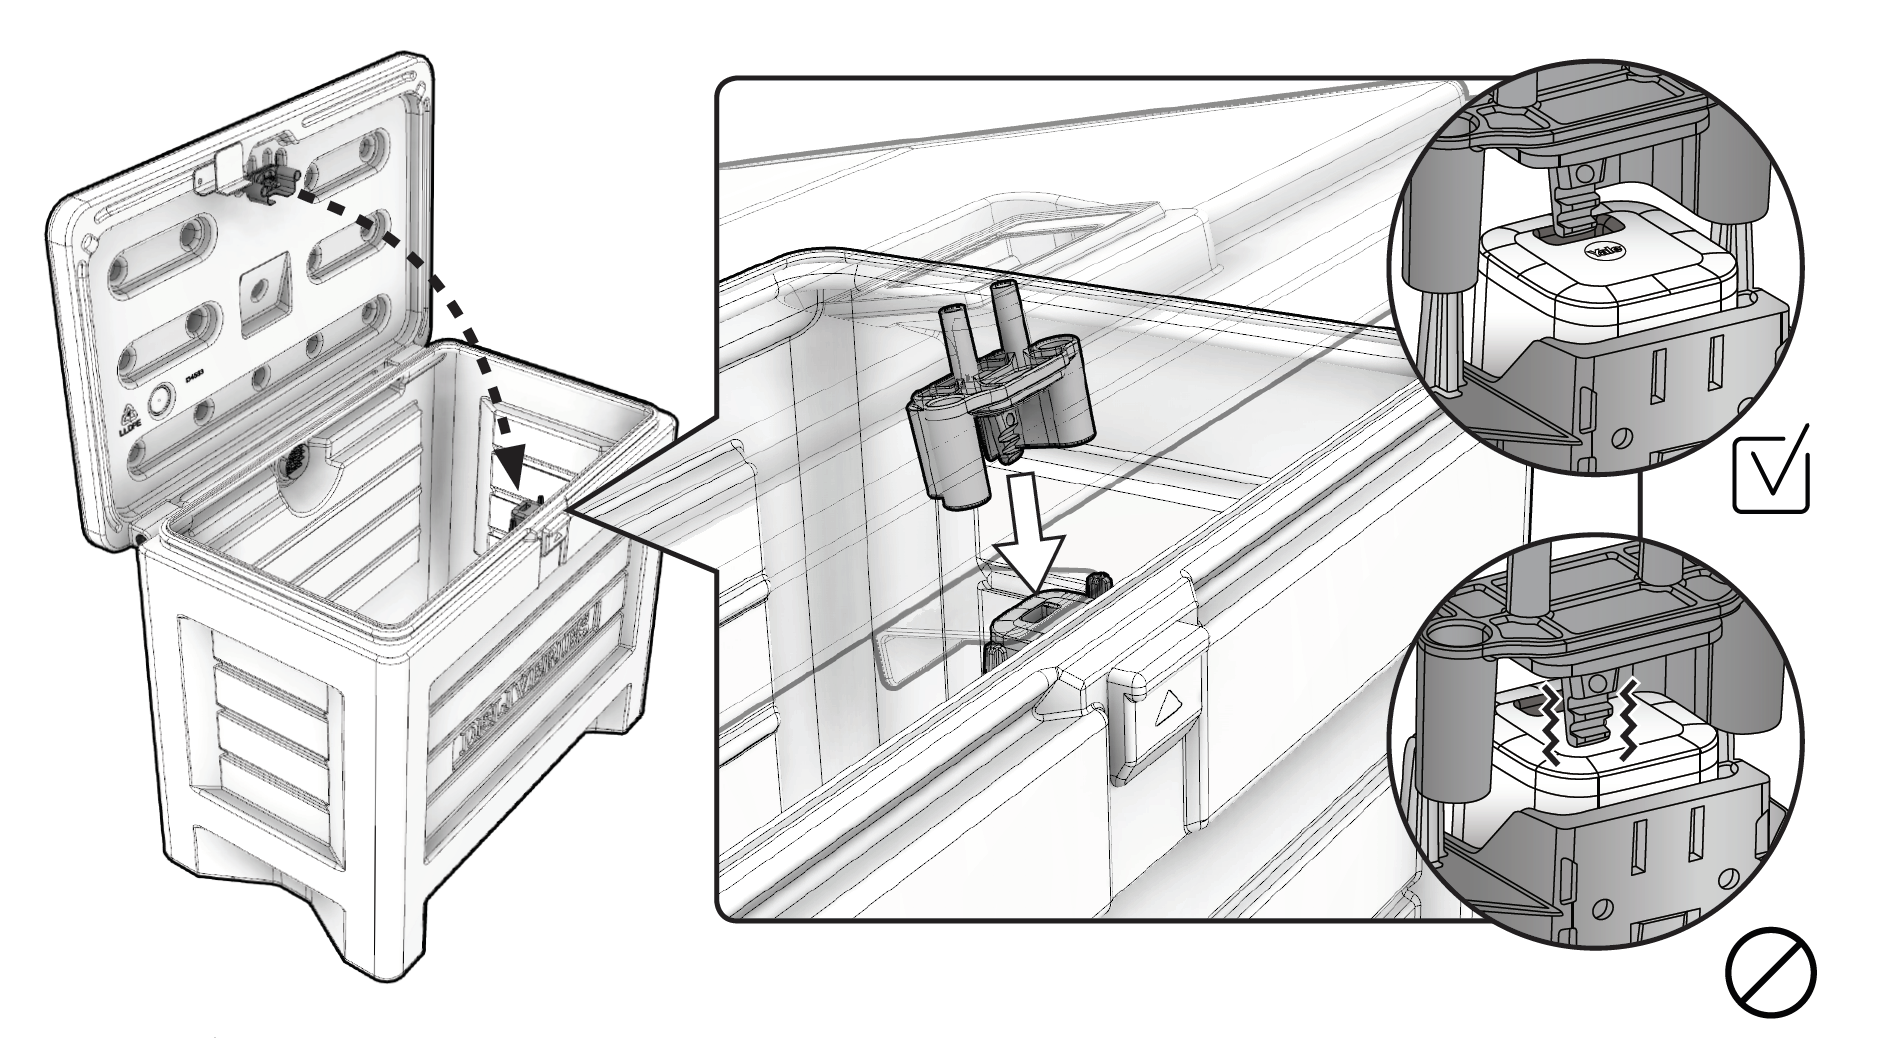
If lid and lock shut correctly move on to step 3. If lid and lock do not shut correctly, you will need to adjust the lock. To adjust lock:
- Use provided torx bit to loosen the lock post bracket from outside of lid.
- While gently closing the lid, reposition lock post ensuring lock post engages the lock correctly.
- With lid closed and lock post properly engaged, re-tighten the lock post bracket.
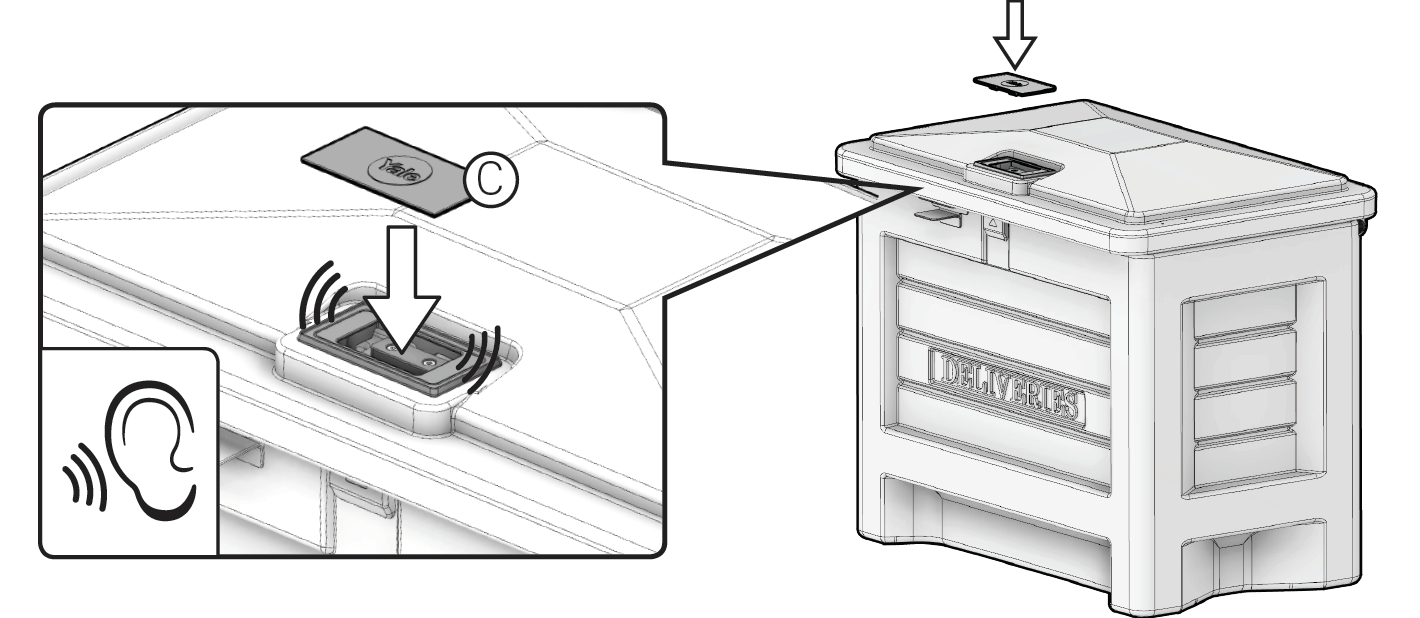
Step 3. Install Yale Logo Plate
Insert Yale logo plate in the slot and push down until you hear it click in place.
Step 4. Install Yale Smart Keypad (Optional)
Use mounting components included with Yale Smart Keypad and mount in desired location.
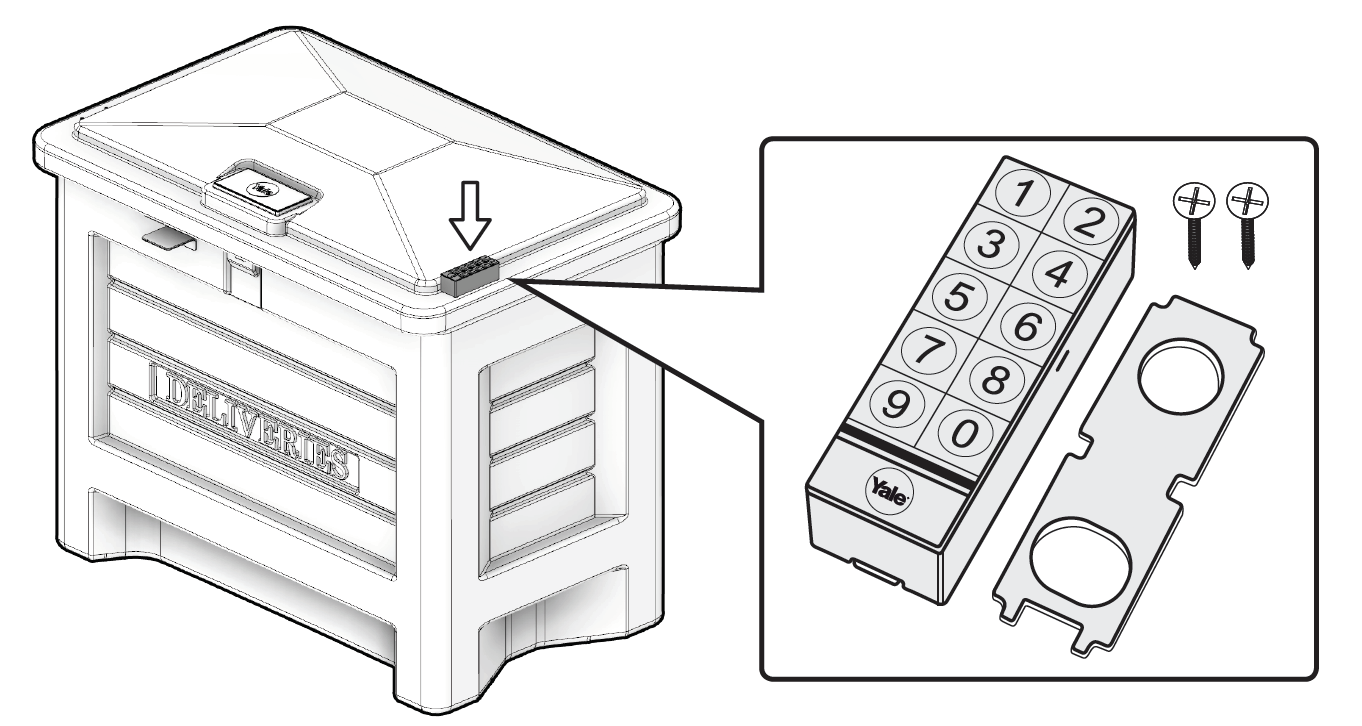
Follow in-app setup instructions for Yale Smart Keypad.
Step 5. Set up Yale Connect Wi-Fi Bridge
Insert the Yale Connect Wi-Fi Bridge into an INDOOR outlet within 15 feet of the Yale Smart Delivery Box. INDOOR USE ONLY. Product is NOT suitable for outdoor use.
Steps to set up Yale Connect Wi-Fi Bridge can be found here.